
Oak Park Epoxy Flooring installs polished concrete floors in Oak Park, IL, serving surrounding cities including River Forest, Forest Park, River Grove, Bellwood and Brookfield. After more than 20 years of grinding slabs for coatings, we know how each concrete floor responds to diamonds, and polished concrete is that same skill carried all the way to a finished surface.
A polished floor is not a coating laid over concrete. It is the slab itself, ground flat through progressively finer diamond tooling, hardened with a densifier and refined until it reflects light, which means there is no film to peel, blister or wear through.
The finish you end up with depends on the concrete you start with. We test the slab, look for old adhesive, patches and cracks, and tell you before the first pass what the floor can realistically become, rather than promising a showroom gloss a tired slab cannot deliver.
How Concrete Polishing Works
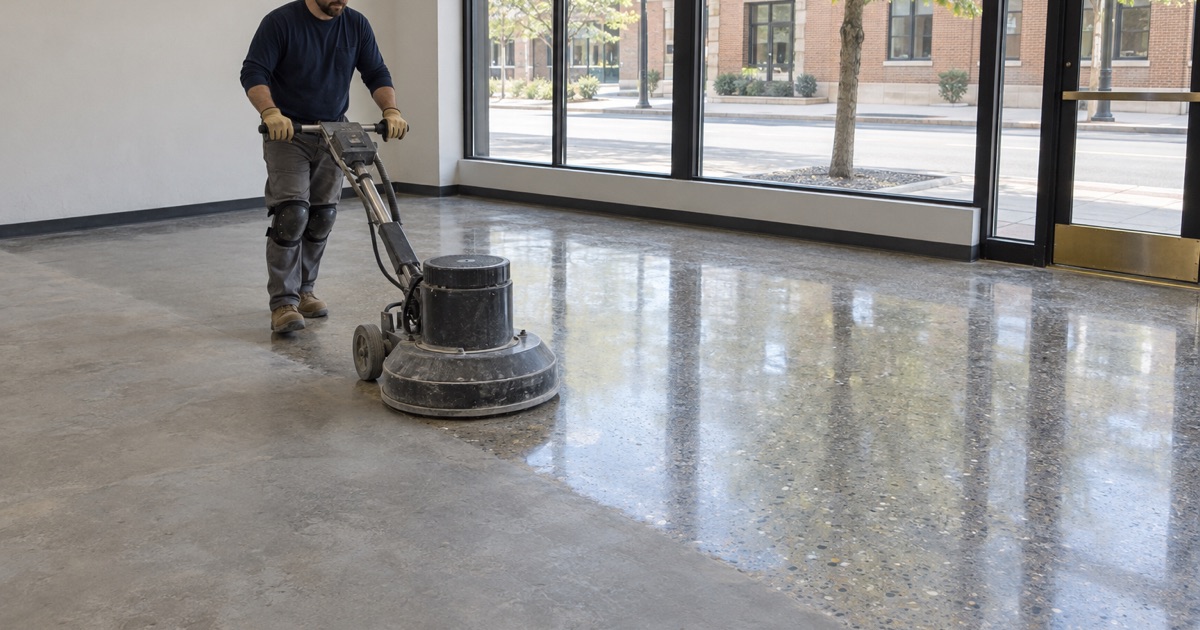
Grinding Passes and Diamond Grit
Polishing starts with coarse metal-bond diamonds that cut the surface flat and remove coatings, sealers and the weak top layer of paste. Each later pass uses a finer grit to remove the scratches left by the one before, moving into resin-bond diamonds as the floor begins to shine.
The number of passes and the final grit decide the sheen. Stopping at a lower grit gives a satin or honed look, while going higher builds clarity and reflection, and we write the final grit into the proposal so the sheen is agreed in advance.
Lithium Silicate Densifier
Partway through the grinding sequence we apply a lithium silicate densifier. It reacts with the free lime in the concrete to form a harder surface, which tightens the pores, reduces dusting and lets the later diamond passes build a cleaner polish.
A densified floor resists abrasion and stains better than bare concrete, but it is not stain-proof. Oils, wine and acids can still mark it if left to sit, which is why most of our polished floors also get a penetrating guard as the final step.
Aggregate Exposure Levels
How deep we grind decides how much of the stone inside the concrete shows. A cream finish stays in the surface paste with almost no stone visible, a salt-and-pepper finish exposes fine sand and small aggregate, and a full exposure grinds down to the larger stone for a terrazzo-like look.
Each slab has its own mix and its own variation in depth, so exposure is never perfectly uniform. We grind a test area where it matters, so you see the actual stone in your floor before choosing how far to go.
Dyes, Stains and Saw-Cut Patterns
Polished concrete does not have to stay gray. Penetrating dyes can be applied between grinding passes to tint the slab in earth tones, blacks or brighter colors, and the polish locks the color into the surface rather than leaving it as a layer on top.
Saw cuts can divide a large slab into tiles, bands or borders, and two dye colors can be set on either side of a cut for a simple pattern. We lay out every line on the slab with you before cutting, because a saw cut in concrete is permanent and cannot be moved once it is made.
Residential Polished Concrete Floors
Polished Basement Floors in Older Homes
Many basement slabs in older homes carry paint, tile adhesive, leveling compound and decades of patches. Grinding removes those layers, but the patches and stains often show through as darker or lighter areas, so we look at the slab with you before recommending a polish rather than a coating.
Polished concrete is a good fit where a basement is dry and the owner wants a durable, low-maintenance floor with the character of the concrete showing. Where the slab tests damp or carries heavy repairs, an epoxy system often gives a more even result, and we say so.
Moisture, Floor Drains and Basement Polishing
Because polishing leaves no film, it tolerates moisture moving through a slab better than a coating does, and it will not blister. That does not make it waterproofing, and it does nothing to stop water rising through a floor drain when the combined sewers surcharge in a heavy storm. We grind carefully around floor drains, sump pits and ejector pits, and we recommend sorting out any backflow or seepage issue before finishing a basement floor of any kind.
Kitchens, Living Spaces and New Additions
New additions and modern renovations sometimes pour a slab intended to be polished as the finished floor. When we are involved before the pour, we can suggest the concrete mix, finishing and curing practices that give the best polish later.
In living spaces, a satin sheen usually reads warmer than a high gloss and hides dust and footprints better. Area rugs work well on top, and radiant heat in the slab pairs naturally with a polished finish. In kitchens we recommend a guard with good stain resistance and prompt wiping of oils, citrus and wine, which are the spills most likely to mark a densified floor.
Commercial Polished Concrete Floors
Storefronts, Showrooms and Offices
Retail and office spaces choose polished concrete because it looks finished, carries foot traffic well and needs only dust mopping and periodic cleaning. When a tenant space turns over, an existing slab can often be ground, densified and polished in a short window instead of being covered with new flooring. We remove old carpet adhesive and tile mastic during the coarse passes, fill joints and cracks, and schedule the work so the next tenant’s build-out can follow on time.
Warehouses, Shops and Light Industrial Floors
In warehouses and shops, a densified and polished slab resists the abrasion and dusting that wear down bare concrete under forklifts and carts. It reflects light, which can brighten aisles, and it avoids the recoating cycle that a thin coating needs in heavy traffic.
Where a shop floor sees oil, solvents or chemicals, a polished slab will stain where a resin coating would not. We look at what actually lands on the floor and recommend polish, a coating or a mix of the two by area.
Working Around an Open Business
Many commercial floors have to be polished while the building stays open. Our grinders run with dust collectors, and we phase the work by area and schedule it overnight or on weekends where a store, office or clinic cannot close.
The proposal sets out each phase, the hours we will work and the day each area returns to use, so the owner can plan staff, deliveries and customers around it.
Our Step-by-Step Polished Concrete Floors Process
Step 1: Slab Assessment and Test Area
We look at cracks, joints, patches, old coverings and moisture, and where the outcome is uncertain we grind a small test patch. Then you get a written proposal with the exposure level, final grit, guard and schedule.
Step 2: Coarse Grinding and Repairs
Metal-bond diamonds remove coverings and flatten the surface. Cracks and joints are filled at this stage so the later passes blend the filler in with the slab around it.
Step 3: Densifying and Honing
The densifier goes on and is allowed to react, then resin-bond diamonds refine the surface pass by pass until it reaches the sheen agreed in the proposal. We check the surface between passes under raking light, because a scratch pattern left by a skipped grit only shows once the floor is fully polished.
Step 4: Polishing, Guard and Handover
The final passes bring up the shine, and a penetrating guard is applied and burnished. We leave cleaning instructions, and most polished floors can take foot traffic as soon as the work is done.
- 20+ Years Coating Concrete
- Moisture Tested Before Quoting
- Written Contract on Every Home Job